As enterprise data continues to grow, the demand for storage capacity is increasing significantly. The need to replace limited local disks with cloud storage that offers limitless capacity has become a widespread requirement and consensus.
Particularly, in commonly used Samba and NFS shares in enterprises, adopting cloud storage as the underlying solution can effectively address challenges related to storage scaling and potential data loss due to local disk failures.
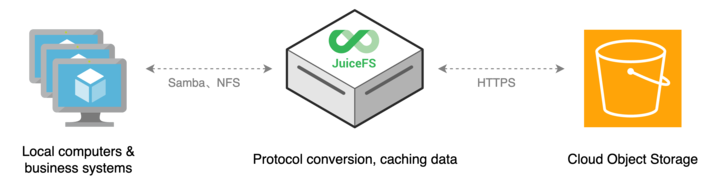
This article demonstrates how to use JuiceFS, an open-source cloud-native distributed file system, as the underlying storage for Samba and NFS. This provides an infinitely scalable cloud storage solution for enterprises.
The article explains two methods: one using the command-line and the other through a graphical interface. You can follow the relevant section based on your preference.
Using command lines
By executing the juicefs mount command, you can mount the JuiceFS file system as a local user-space file system via the FUSE interface. It’s similar to local file systems in terms of structure and usage. This allows you to directly create Samba or NFS shares using the JuiceFS mount point or subdirectories.
Create Samba shares
Most Linux distributions provide Samba through their package managers, which can be directly installed. For example, on Debian/Ubuntu, you can install it using the following command:
sudo apt install sambasudo apt install sambaIf you need to configure an Active Directory (AD) domain controller (DC), you need to install additional software packages. For more details, see the Samba Official Installation Guide.
According to the Samba official documentation, it is recommended to use file systems that support extended attributes (xattr). To enable extended attribute support for JuiceFS during the mount process, use the --enable-xattr option. For example:
sudo juicefs mount -d --enable-xattr sqlite3://myjfs.db /mnt/myjfsThen, you can create shares using the JuiceFS mount point or subdirectories. For example, to create a share named "Media":
[Media]
    path = /mnt/myjfs/media
    guest ok = no
    read only = no
    browseable = yes
For macOS extended attributes support:
For Samba versions older than 4.9, if you want macOS users to access Samba shares, you should include the ea support = yes option in the [global] section of the Samba configuration. This will enable support for extended attributes used by macOS. Edit the configuration file /etc/samba/smb.conf, for example:
[global]
    workgroup = SAMBA
    security = user
    passdb backend = tdbsam
    ea support = yes
Samba version 4.9 and above enable the ea support option by default, so you don’t need to set it manually.
Create NFS shares
As NFS is a sharing protocol on Unix/Linux systems, it doesn't require extended attributes (xattr). When your directories from the JuiceFS file system are only for NFS sharing, you don’t need to use the --enable-xattr option during mounting. Mount points and subdirectories can be directly employed for NFS sharing.
For example, to share the "media" directory from JuiceFS using NFS, you can add the following entry to the configuration file /etc/exports:
"/mnt/myjfs/media" *(rw,async,no_subtree_check,fsid=1)The format for NFS share configuration is as follows:
<Share Path> <Allowed IPs>(options)For example, to limit access to the subnet 192.168.1.0/24, you can modify it like this:
"/mnt/myjfs/media" 192.168.1.0/24(rw,async,no_subtree_check,fsid=1)Description of the share options:
rw: Grants read and write permissions.async: Enables asynchronous writing for faster speed, though it might reduce data reliability. You can also set it tosyncfor slower write speed but improved data reliability.no_subtree_check: Disables subtree checking, allowing clients to mount both the parent and child directories of the NFS share. This can reduce some security but improve NFS compatibility. Setting it tosubtree_checkenables subtree checking, allowing clients to only mount the NFS share and its subdirectories.fsid: A file system identifier used to identify different file systems on NFS. In NFSv4, the root directory of NFS is defined as fsid=0, and other file systems need to be numbered uniquely under it. Here, JuiceFS is an externally mounted FUSE file system, so it needs to be assigned a unique identifier.
If you are unfamiliar with or do not like command-line management of Samba or NFS sharing, you can simplify the process by using graphical tools.
Using graphical tools like Cockpit
Cockpit is an open-source tool suitable for Linux server management through a web interface. It allows administrators to perform various management tasks directly in a browser, without the need for complex tools or command lines. By installing extensions, you can enable Samba and NFS sharing management within the graphical interface.
For stable and long-term local Samba and NFS sharing, you can set up a dedicated server or virtual machine. Mount the JuiceFS file system on this host and use Cockpit's management tools to configure and manage Samba and NFS sharing. This way, you can provide storage to computers and application systems in your local network. JuiceFS will handle data storage in public cloud object storage or cache it locally, offering nearly limitless storage space.
System specifications and recommendations
Hardware requirements
Samba and NFS are network-based file sharing protocols. Their performance is influenced by factors like hardware capabilities, network bandwidth, client count, and file access patterns. For small-scale networks with a few clients, lower-specification hardware can suffice.
Samba, designed for Windows systems, involves complex conversions between Linux and Windows. In scenarios with many clients, concurrent access, or substantial data transfers, Samba might require more CPU resources. In high-load situations, NFS tends to provide better efficiency and throughput.
You must adjust hardware and software configurations based on actual requirements. Consider the following aspects:
- Ensure sufficient SSD storage: As a JuiceFS cache disk, the cache size should exceed the anticipated hot data volume.
- Enhance network bandwidth: In cases of multiple concurrent clients or large data transfers, network bandwidth could be a bottleneck.
- Meet basic Linux system requirements: For example, a 4-core CPU, 8 GB RAM, and 20 GB system disk.
Recommended systems
Cockpit, a Red Hat-sponsored open-source project, is pre-installed and readily usable in RHEL and its derivatives. It exhibits better compatibility than systems like Ubuntu or Debian, with fewer minor issues. Consider using the following operating systems:
- Rocky Linux
- AlmaLinux
- Fedora
Of course, you can opt for Ubuntu, Debian, Arch Linux, openSUSE, or other systems based on your preferences.
Cockpit installation, configuration, and plugin setup
Step 1: Install and launch Cockpit
Most mainstream Linux distributions support Cockpit installation. If your system lacks a pre-installed version, see the official Cockpit website for installation instructions.
For AlmaLinux, the system used in this article, you can start Cockpit from the terminal using the following command:
sudo systemctl enable --now cockpit.socketStep 2: Access and use the Cockpit interface
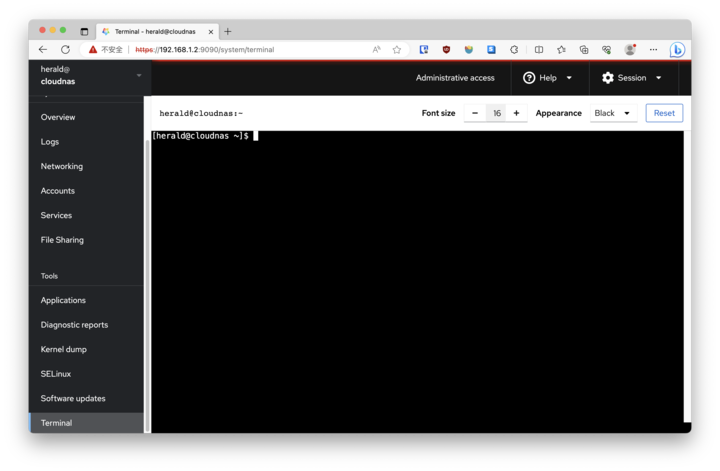
When the service is started, enter https://<your-local-ip>:9090 (replace <your-local-ip> with your actual IP address) in your browser to open the Cockpit interface.
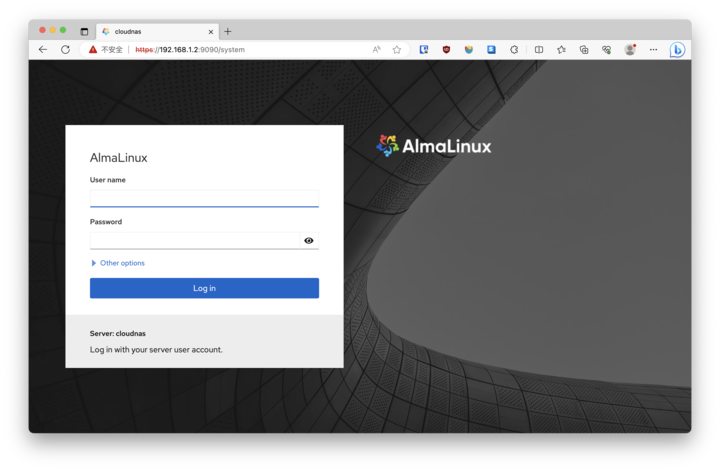
Since it involves system management, use an account with sudo privileges or the root user to log in.
Cockpit features a web shell, a web-based terminal that allows you to execute command-line operations directly. This is more convenient than SSH logins.
Step 3: Install the File Sharing plugin
Cockpit, by default, offers basic system management features. You can enhance its capabilities by installing plugins. Check out Cockpit’s supported plugins.
In the plugin list, you'll find File Sharing. This third-party plugin developed by 45Drives provides a management interface for Samba and NFS sharing within Cockpit.
Access the File Sharing repository source code and download the corresponding package for your system in the Cockpit terminal (the example provided is for demonstration; it's recommended to download the latest version):
curl -LO https://github.com/45Drives/cockpit-file-sharing/releases/download/v3.3.4/cockpit-file-sharing-3.3.4-1.el8.noarch.rpmInstall the required dependencies and the plugin:
# Install dependencies
sudo dnf install fuse samba nfs-utils
# Install the plugin
sudo dnf install ./cockpit-file-sharing-3.3.4-1.el8.noarch.rpm
Once installed, refresh the page to see the File Sharing plugin menu and interface.
JuiceFS client installation, file system creation, and mounting
Step 1: Install the JuiceFS client
You can install the latest stable version of the JuiceFS client with a single command in the terminal:
curl -sSL https://d.juicefs.com/install | sh -For other installation methods, see the JuiceFS installation documentation.
Step 2: Create the JuiceFS file system
A JuiceFS file system consists of two parts:
- Object storage, which stores data. Check out the supported object storage options in JuiceFS.
- The metadata engine, which stores file metadata in a database. Check out the supported databases in JuiceFS.
Public cloud object storage often involves storage fees, downstream data transfer charges, and API request costs. Evaluate and select based on your actual needs. Some cloud providers offer resource packs for different billing aspects of object storage, offering discounts compared to pay-as-you-go. For better read-write speed, when you create a bucket, choose a storage region closer to your physical location. Although JuiceFS supports both standard and infrequent access storage, it's recommended to choose standard storage for the internal network data sharing discussed in this article. This recommendation is due to the potential minimum storage duration and retrieval costs associated with infrequent access storage, ensuring private read and write capabilities.
Since this article focuses on a scenario similar to "cloud storage gateway," with JuiceFS running on a local standalone host and providing storage through Samba and NFS protocols to internal network users and systems, more flexible metadata engine options are available:
- For usage within a single local network, consider standalone databases like SQLite or BadgerDB. Alternatively, you can deploy databases like Redis or MySQL within the local network.
- If you require multiple locations or LANs to simultaneously share the JuiceFS file system, use a database accessible over the internet. Choosing Amazon Relational Database Service (RDS) or deploying Redis, MySQL, or PostgreSQL on cloud servers would be preferable.
Here's an example of creating a JuiceFS file system using SQLite as the metadata engine:
juicefs format --storage oss \
--bucket https://myjfs.oss-cn-shanghai.aliyuncs.com \
--access-key your-access-key \
--secret-key your-secret-key \
sqlite3:///home/herald/myjfs.db \
Myjfs
When you create the file system, note that:
- Different object storage providers have different type values, for example, s3 for AWS. For details, see Supported object storage.
- If the platform provides both intranet and internet bucket addresses, select the internet address, as local access is required.
- Access keys and secret keys are used for object storage authentication. Refer to the documentation of your chosen object storage provider for creating these credentials.
- The database address supports both absolute and relative paths. For configurations involving automatic mount on boot, use absolute paths.
Step 3: Mount the JuiceFS file system
For a newly created JuiceFS file system, you can manually mount it once to confirm correctness before configuring automatic mounting. For example:
sudo juicefs mount --enable-xattr \
--cache-dir /your-ssd \
--cache-size 1024000 \
sqlite3:///home/herald/myjfs.db \
/mnt/myjfs
This foreground mount provides real-time output about critical operations. Use this information to troubleshoot warnings and errors.
If executing the command results in sudo: juicefs: command not found, modify the /etc/sudoers file to add /usr/local/bin to the secure_path. It should look like this:
Defaults secure_path = /sbin:/bin:/usr/sbin:/usr/bin:/usr/local/binAfter you confirm the mount is successful, configure automatic JuiceFS mounting on boot. Use the shortcut ctrl + c to terminate the program and then create a symbolic link mount.juicefs for the client:
sudo ln -s /usr/local/bin/juicefs /sbin/mount.juicefsEdit the /etc/fstab file, adding a new line with the JuiceFS mount details:
# <metadata engine URL> <mount point> <file system type> <mount options>
sqlite3:///home/herald/myjfs.db /mnt/myjfs juicefs _netdev,max-uploads=50,writeback,cache-size=1024000,enable-xattr 0 0
Description about mount options:
_netdevindicates the system should not mount the file system before network devices are available. This is crucial for file systems requiring network access.max-uploads=50limits the concurrent uploads to the file system, helping prevent overloading.writebackenables write caching, storing files in a local cache before uploading to public cloud object storage. While it improves performance, data loss might occur during power outages.cache-size=1024000specifies the cache size for the file system in MiB. Here, 1 TB cache is set.enable-xattrenables extended attribute support for JuiceFS.
Remember to adjust values based on your scenarios.
Because /etc/fstab is mounted with root user privileges, you don’t need to add the allow_other mount option in the mount information.
Restart the system or execute the following command to mount JuiceFS:
# Reload systemd processes
sudo systemctl daemon-reload
# Mount all file systems
sudo mount -a
Samba share creation and user account management
Create Samba shares
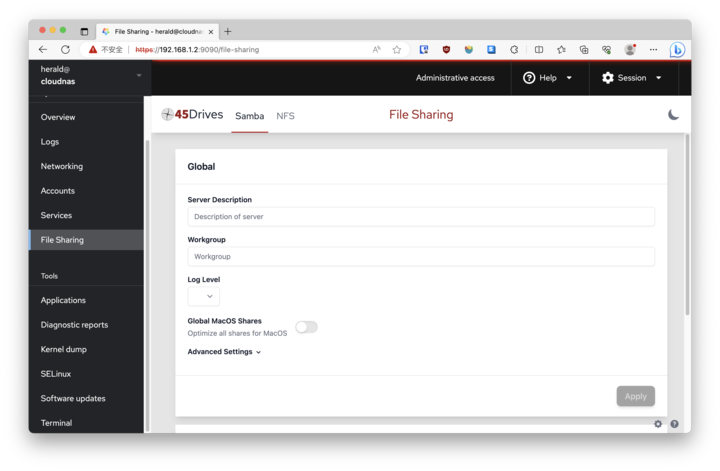
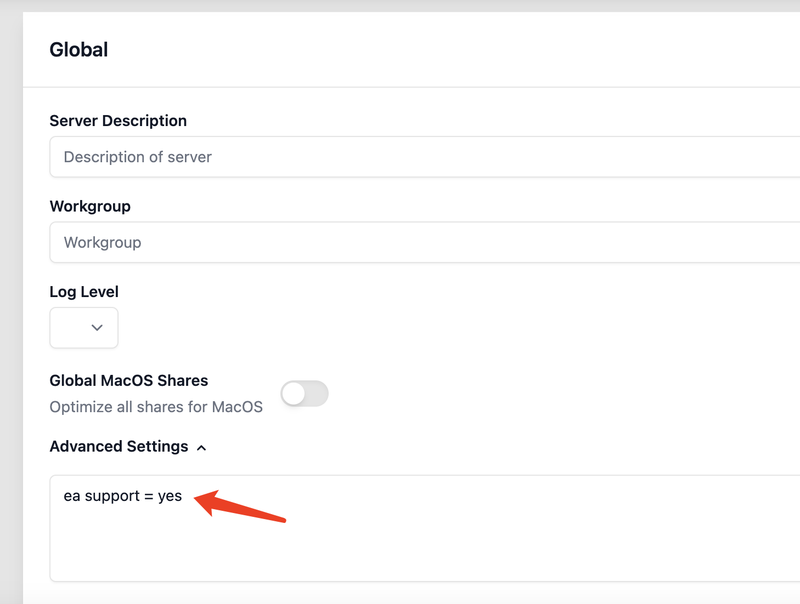
Go to the File Sharing plugin interface. If your Samba version is below 4.9 and you need macOS access, expand Advanced Settings under Global in the Samba tab. Add "ea support = yes" to enable extended attribute support for Apple products.
To create a Samba share, click on the Shares section and use the + button to start creating a Samba share. Configure the options as follows:
- Share Name: The name of the share.
- Share Description: Optional share description.
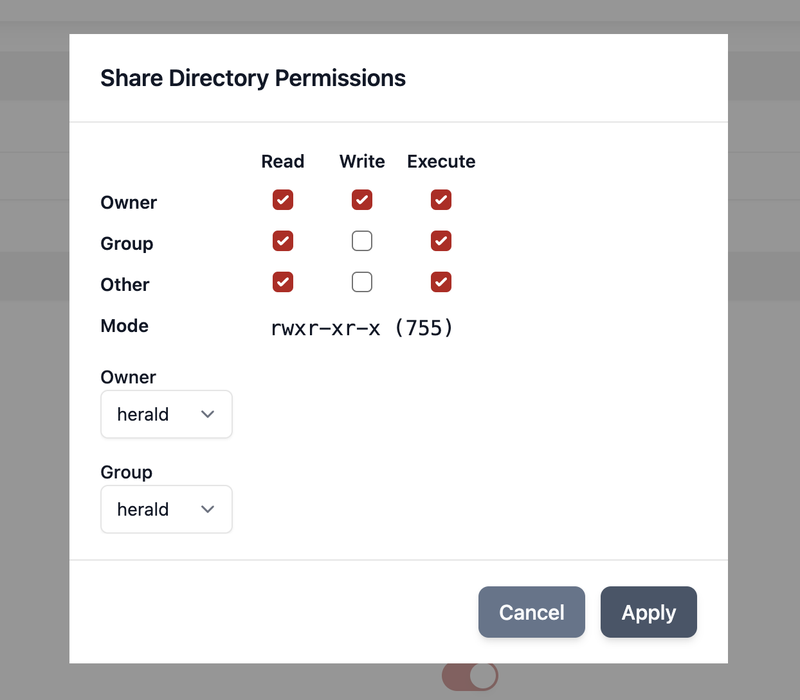
- Path: Path to the shared folder. Enter the JuiceFS mount point or subdirectory. If the specified directory doesn't exist, you can click Create now to create it. Click Edit Permissions below to adjust directory permissions.
- You can adjust other options according to your needs.
Click Confirm to complete the creation.
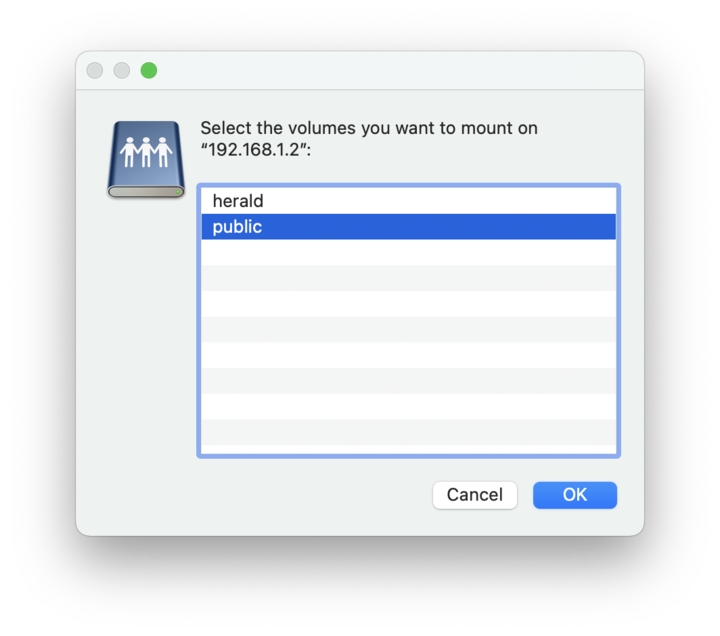
On Windows or macOS, you can access the share using a file manager. For example, on macOS:
- Open Finder and hit command + k.
- Enter the internal IP address of the host where JuiceFS is located.
- Enter your username and password for authentication.
- Select the Samba shared directory from the prompted list.
5. If you encounter permission issues, return to File Sharing, find the corresponding share, and adjust directory permissions using Edit Permissions.
You can combine Cockpit's user account management feature to allocate access permissions for Samba shares based on users and groups. This allows for flexible multi-user, multi-permission sharing and management capabilities.
About Samba user accounts
Samba has its own user database separate from the operating system users. However, when a user with the same name is created in the Samba database as in the system, automatic mapping occurs. This allows for the display of user home directories in Samba shares.
For example, if my system account is “herald,” I can create a Samba account like this:
sudo smbpasswd -a heraldFollow the prompts to set the password. Samba accounts can have passwords different from system users.
Additionally, you can install the Cockpit Identities plugin, which provides a graphical user interface for managing both system and Samba accounts.
NFS share creation and mounting on macOS
Create NFS shares
Similar to setting up Samba shares, creating NFS shares involves switching to the NFS tab in the File Sharing. In Shares, click + to add a new share:
- Share Path: Specifies the path of the shared directory. This should be the mount point or subdirectory of JuiceFS. If the directory doesn't exist, you can create it by clicking Create now. Adjust directory permissions by clicking Edit Permissions.
- Clients: Configures the allowed clients for the NFS share. Set Host to specify permitted host addresses, and set Settings to define mount parameters.
Tips: As mentioned earlier, JuiceFS is an external FUSE file system. To use it as a shared directory, assign an fsid greater than 0, for example: rw, async, no_subtree_check, fsid=1.
Then, you can mount it on any host with an NFS client. For example:
sudo mount -t nfs 192.168.1.26:/mnt/myjfs/nfs mntMount NFS on macOS
While macOS supports NFS share mounting, executing the mount command might result in an Operation not permitted error. You can resolve this issue by using the -o resvport parameter. For example:
sudo mount -t nfs -o resvport 192.168.1.26:/mnt/myjfs/nfs mntIn summary
This article has provided guidance on using the JuiceFS file system for NFS and Samba shared storage. This setup allows for an internal network-oriented shared storage space with virtually no capacity limit. The inclusion of Cockpit's graphical management interface makes it easier for users to handle multi-user, multi-permission Samba and NFS shares. Additionally, I’ve shared various common issues and solutions for mounting and accessing shares.
If you have further questions, feel free to join our discussions on GitHub and the JuiceFS community on Slack.